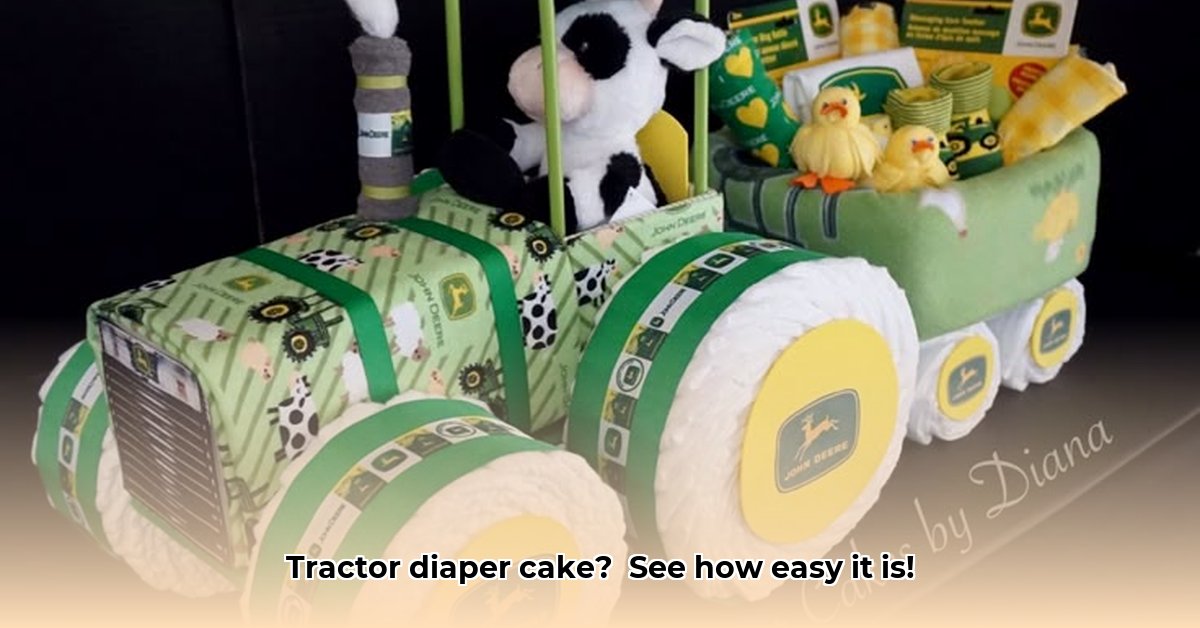
Want to create a unique and practical baby shower gift? A tractor nappy cake is the perfect solution! This easy-to-follow guide will show you how to build an adorable and useful gift that's sure to impress. Let's get started!
Gathering Your Supplies: Everything You Need for Tractor Cake Success
Before you begin, gather these essential supplies. You'll need around 30-40 nappies (diapers), depending on the size of your tractor. More nappies mean a bigger cake! Don't forget these other key items:
- Sturdy Base: A small wicker basket, sturdy cardboard box, or attractive container to hold the diaper structure.
- Rubber Bands or String: To secure the nappy rolls tightly. String provides a neater look.
- Ribbon: Bright green and yellow ribbon will make your tractor pop! Consider additional colors for extra flair.
- Small Toy Tractor: A cute plush tractor is the perfect finishing touch!
- Hot Glue Gun (adult supervision required!): The magic that holds everything together.
- Scissors: For cutting ribbon and making neat edges.
- Optional Embellishments: Felt cutouts, small farm animals, or other decorative elements to personalize your creation.
Building the Tractor's Body: A Step-by-Step Guide
Now for the fun part! Let's build that tractor body.
Roll the Nappies: Roll each nappy tightly and secure it with a rubber band or string. Ensure each roll is consistent for a neat final product.
Shape the Body: Arrange the rolled nappies in a rectangular shape within your base to form the tractor's body. Secure the rows with more rubber bands or glue dots, ensuring stability.
Wrap it Up: Wrap the entire nappy body with green ribbon, tying it neatly at the ends. This step adds a polished, professional look.
Creating the Wheels: Two Easy Options for Your Tractor
Now for the wheels! You have two options: the super-easy method or the perfectly round method.
Option 1: The Super-Easy Wheels (Quick & Simple!)
This method is perfect if you're short on time.
- Gather a few more nappies and roll them into tight bundles. Secure with rubber bands.
- Glue these bundles to the sides of the tractor body – and you've got wheels!
Option 2: Perfectly Round Wheels (A Little More Effort, Big Rewards!)
For perfectly round wheels, follow these steps:
- Use a Template: Use a small, clean bowl or saucepan as a template to form your nappy bundles into perfect circles. This may take a few tries – but the result is worth the effort!
- Secure and Decorate: Wrap each circular bundle tightly with ribbon, securing with a knot. Then, glue the wheels to the tractor's sides.
Adding the Finishing Touches: Personalizing Your Tractor Masterpiece
Almost there! Time for the final touches.
- Attach the Tractor Toy: Carefully glue your toy tractor to the top of the nappy cake.
- Add Personal Touches: Get creative! Add felt cutouts, small farm animals, or other embellishments to personalize your creation.
Tips, Tricks, and Troubleshooting: Making it Perfect!
- Colorful Creativities: Use different colored ribbons to create stripes or patterns on your tractor.
- Embrace Imperfections: Don't stress about perfection! Slightly lopsided wheels or uneven ribbon add character!
- Consider Alternatives: If you don't have a glue gun, strong double-sided tape can work well, though it might require more patience.
Show Off Your Amazing Creation!
You did it! You've built a fantastic tractor nappy cake! Share a picture of your masterpiece with us – we'd love to see it! Remember, the most important thing is to have fun and create something special. Happy crafting!